TallyPrime helps you to set up different preferences based on your business needs. Once you have created your company, you can choose to open your company automatically next time you open TallyPrime.
Similarly, you can set your company’s data path, predefine your invoice printing, e-mailing, and exporting preferences.
Load Companies on Startup
In TallyPrime, you can choose one or more companies to open by default, without you having to select and open each time.
- Press F1 (Help) > Settings > Startup.
The Startup Settings screen appear.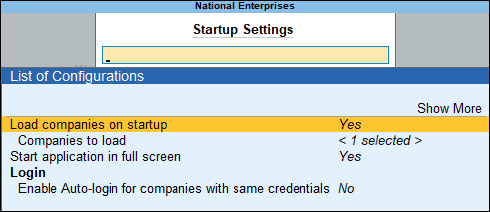
- Set Load companies on startup to Yes.
- Select Companies to load and press Enter.
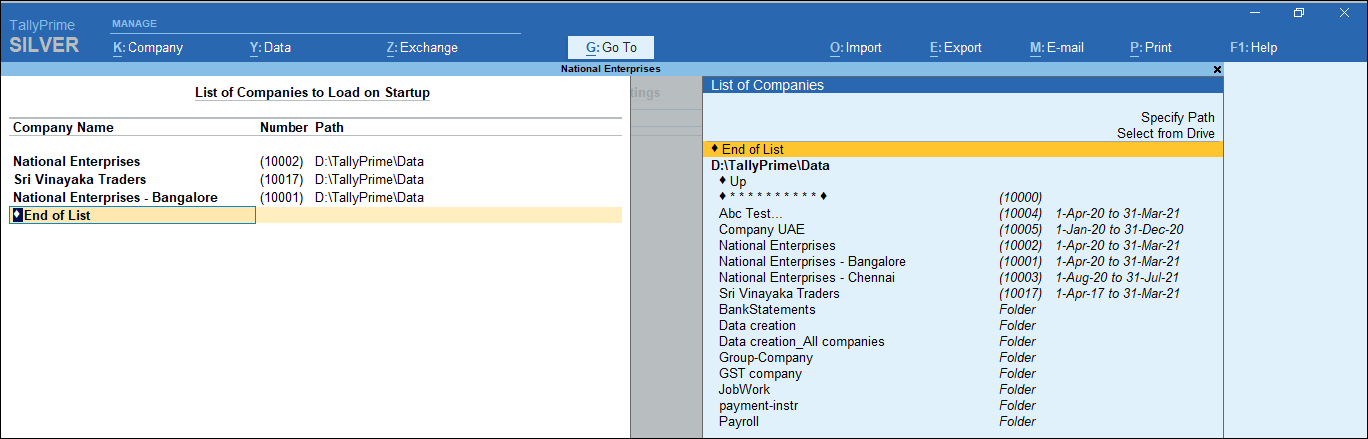
- Select the companies you want to load on startup.
If your company is not listed in the path that appears, you can select companies from other paths in your computer.- Select from Drive > browse to the path where your company data is stored and press Enter.
- Select the Companies that you want to load.
- Under Company Name, select End of List once you have selected the companies and press Enter.
The Startup Settings screen displays the number of companies you have selected (<3 selected> in this case). - Press Esc.
Next time you open TallyPrime, the companies that you had set to open on startup will be loaded automatically.
Set Up Company Data Path
Every time you create a company, TallyPrime saves your company data in the default path. Based on your needs, you may need to select the data path where you want to store the company data.
You can set up the company data path in TallyPrime, so that next time you create a company, TallyPrime considers that path as default. You can also predefine the path where you can back up your company data, when required.
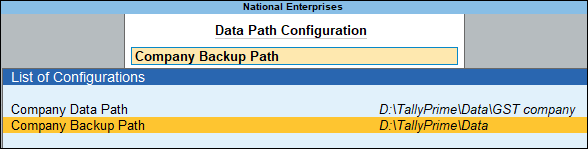
- Press Alt+Y (Data) > Data Path.
- Select Company Data Path or Company Backup Path as needed and set the preferred path.
For more information, refer to Manage Your Company Data.
Auto-Login to Your Companies
You might be maintaining more than one companies, and you have set the same username and password to login to each company. Instead of entering the username and password for each company separately, you can opt to access the company data in one go.
- Press F1 (Help) > Settings > Startup.
- Set Enable Auto-login for companies with same credentials to Yes.
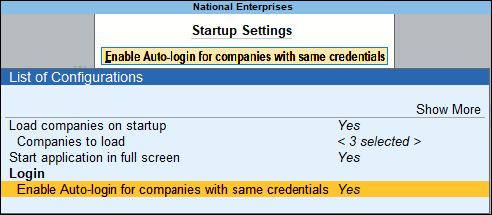
Next time you login to one of the companies, when you open other companies with the same credentials you will not need to enter the credentials.
Voucher and Report Sharing Preferences | Set Up E-mail, Export and Print
In your day-to-day transactions, if you need to e-mail, export or print your invoices with specific settings, you can manage them in TallyPrime.
- To set up Export configurations, press Alt+E (Export) > Configuration.
- To set up E-mail configurations, press Alt+M (E-mail) > Configuration.
- To set up Print configurations, press Alt+P (Print) > Configuration.
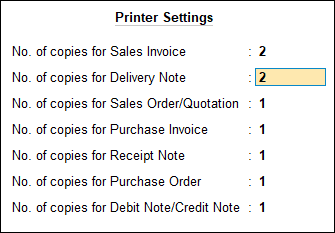
For example, to set up print configurations for your invoices, you can set up the number of copies you need to print for your invoices each time you generate an invoice.
- Under Print Configuration, select Set no. of copies for printing invoices and press Enter.
- Specify the number of copies you need for each of the invoices. A sample image is shown below.
Similarly, you can set up other print configurations, including advanced configurations, as in the sample screen below: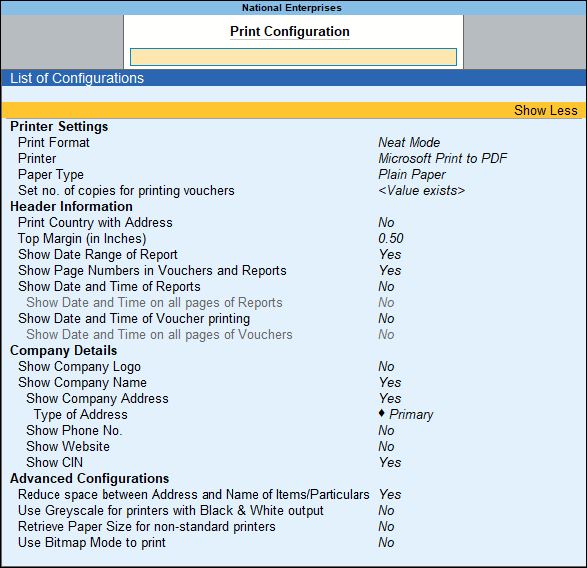
When you open TallyPrime, you can open or load the company without you having to select it
Language Settings in TallyPrime
Depending on your business practices and preferences, you may need to view data or make data entry in a specific language. You can set up your TallyPrime to meet such requirements.
In this section
Display Language
- Press F1 (Help) > Settings > Language.
- Select Display Language and press Enter.
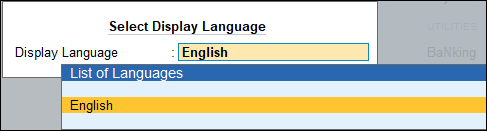
- Select the required Display Language for viewing your Company data, and press Enter.
Data Entry Language
- Press F1 (Help) > Settings > Language.
- Select Data Entry Language and press Enter.
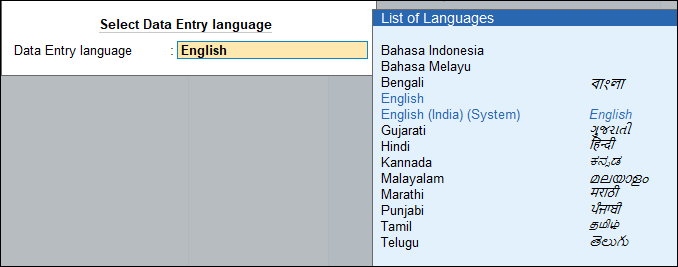
- Select the Data Entry language based on your preference and press Enter.
You can now enter data in your masters and transactions in the selected language.
Set Up Data Synchronisation Needs
If you synchronise your company data in regular intervals and need to follow a consistent setup, all of these can be predefined in TallyPrime.
- Press F1 (Help) > Settings > Connectivity.
For more information, refer to Synchronisation.
Set Up Company Features
When you create a Company, TallyPrime helps you to set up the company features on the fly. However, you can press F11 (Features) and set the required features for your company based on your expanding business needs. For more information, refer to Company Features.
Create Multiple Addresses for Company
The Multi Addresses feature in TallyPrime allows you to maintain multiple mailing details for your company and parties. Create multiple addresses for your company and print them in invoices and reports. Also, you can print the addresses of your branches or locations in your commercial invoices and reports as required.
To create multiple addresses for the company, follow the steps below:
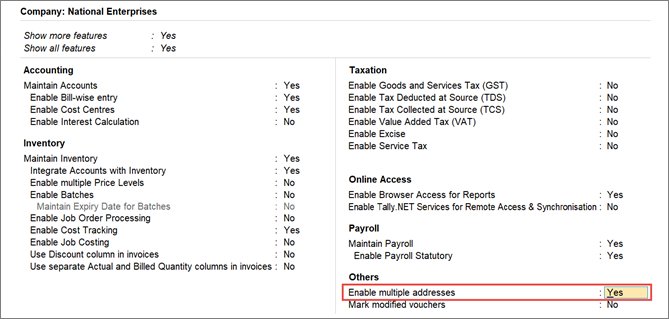
- Press F11 > set the option Enable multiple addresses to Yes.
Alternatively, from the Company Features Alteration screen, press Ctrl+I (More Details) > Multiple Addresses.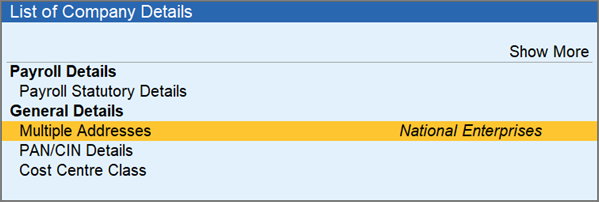
The Address Type screen appears as shown below.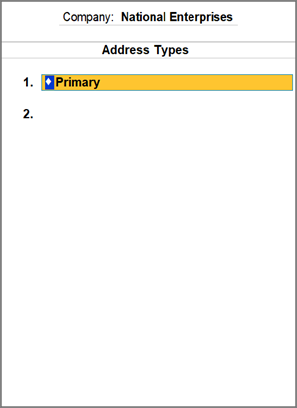
- In the Address Type screen, provide multiple addresses for your company.
- While your cursor is on Primary, press Enter to view or update the address if needed.
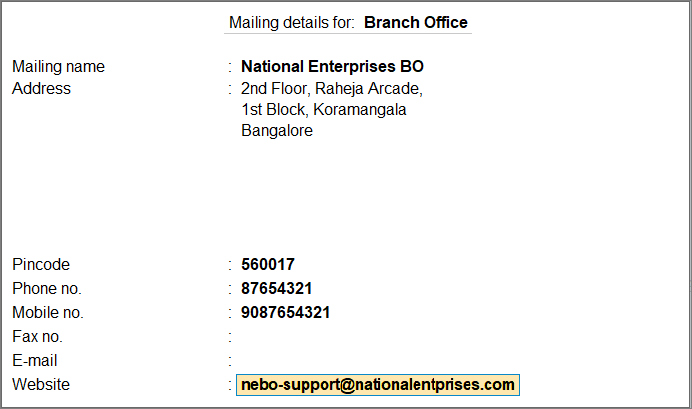
Note: The Primary Address type has the Mailing Details provided in the Company Creation screen. You can alter the primary mailing details from this screen, if required. - On moving to the next line, type a name (for example, Branch Office) for the Address Type, and Enter, and type the address details (Mailing name, Address, Pincode, and so on).
- Press Enter to accept the screen. As always, you can press Ctrl+A to save.
- While your cursor is on Primary, press Enter to view or update the address if needed.
You can add as many addresses as per your business requirement. After adding multiple addresses, you can use the address in the invoices while printing, exporting, and e-mailing.
Create Multiple Addresses for Party
In your business, you might be dealing with parties who may want their billing address to be different from their mailing address. Additionally, your party may want you to ship the goods to a consignee address from the billing address. In all such cases, you can create multiple addresses for your party and select the Ship to and Bill to addresses conveniently, while recording a transaction. Moreover, you can also choose if the party mailing address or the shipping address should be printed in the invoice, as per your party’s requirements.
- In the party ledger, set the option Mailing Details, Set/alter multiple mailing details as Yes.
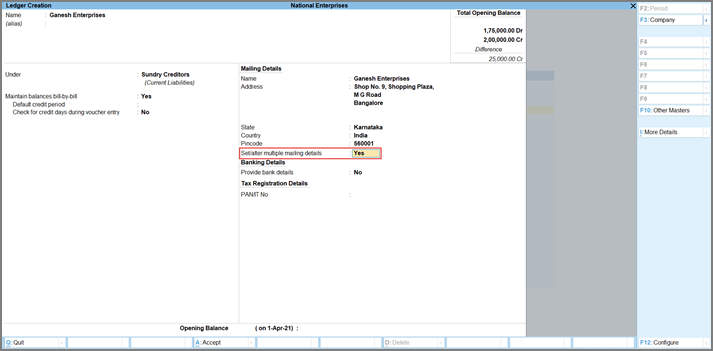
Alternatively, press Ctrl+I (More Details) > Multiple Addresses.
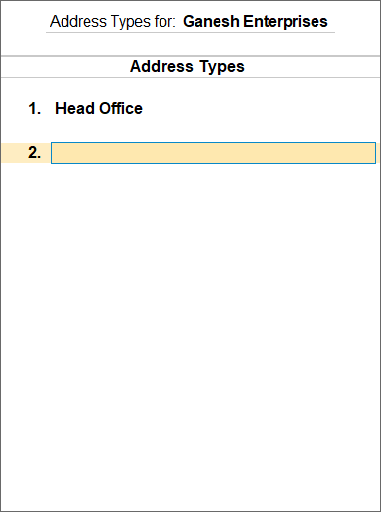
- In the Address Type screen, provide multiple addresses for the party.
- Type the name of the Party’s Location (for example, Head Office).
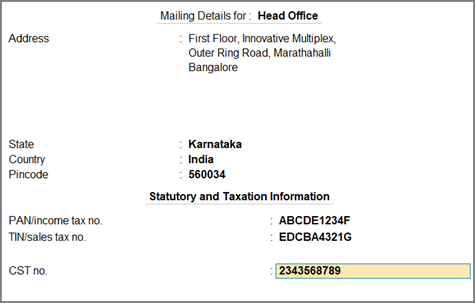
- On the Mailing Details screen, type the Mailing Name, Address, State, Pincode, and the Statutory & Taxation Information in the respective fields provided. The filled Mailing Details screen appears as shown below:
- Press Enter, the Address Type screen appears.
- Type the name of the Party’s Location (for example, Head Office).
- Enter another Address Type name (for example, Branch Office) to create the required Mailing Details.
- Press Enter to accept the screen. As always, you can press Ctrl+A to save.
Use Different Addresses on a Voucher
Now you have created multiple addresses for your party, you can seamlessly select the Bill to/Ship to address for your party while recording an invoice. For example:
While creating a Sales voucher for that party, in the Party Details form:
- Address Type > select from the List of Address Types that is required as the Bill to address.
If you have a different consignee, you can also select a different Ship to address, as per your business needs.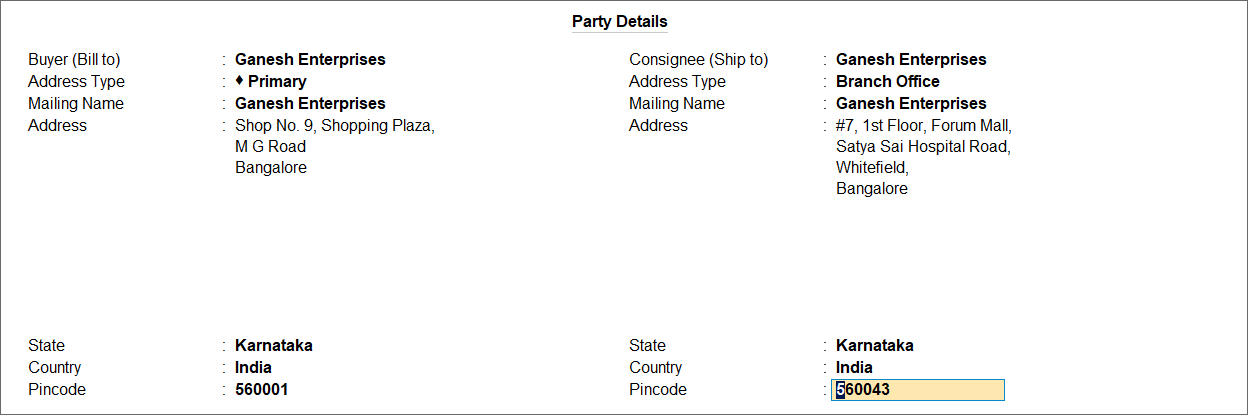
Note: If the Consignee details are not shown, press F12 (Configuration) and set Provide separate Buyer and Consignee details to Yes. - Press Y to accept the screen. As always, you can press Ctrl+A to save.